Configuring the banner
Dependency-Track supports a configurable, application-wide banner that is displayed at the top of the application for all authenticated users. This guide covers how administrators enable, style, and manage the banner.
Overview
The banner is intended for short, system-wide announcements, for example planned maintenance windows or important notices. It is shown to authenticated users only and does not appear on the login or change-password pages.
The banner is configured entirely from the administration UI under
Administration → Configuration → Banner (route /admin/configuration/banner).
Note
Access to the banner configuration requires the SYSTEM_CONFIGURATION
permission.
Settings
The configuration screen exposes the following controls:
| Setting | Description |
|---|---|
| Activate banner | Master on/off switch. When disabled, no banner is shown. |
| Allow users to dismiss banner | Adds a close (×) button so users can hide the banner. See Dismissing the banner. |
| Message | Plain-text content of the banner (default mode). |
| Color scheme | Preset color of the banner (default mode). |
| Custom mode | Switches to an HTML editor instead of message + color scheme. |
| HTML content | Raw HTML rendered as the banner (custom mode). |
The banner content can be defined in one of two modes: the default text-and-color mode, or the custom HTML mode.
Modes
Default mode
The default mode renders a plain-text Message using one of the preset Color schemes. This is the recommended option for most announcements.
The following color schemes are available:
redorangegreenbluelilac
To configure a banner in default mode:
- Enable Activate banner.
- Enable Allow users to dismiss banner if users should be able to close it.
- Enter the banner text in the Message field.
- Select a Color scheme.
- Leave Custom mode disabled.
- Select Update to save.
Note
The Update button remains disabled while the banner is active and the Message field is empty.
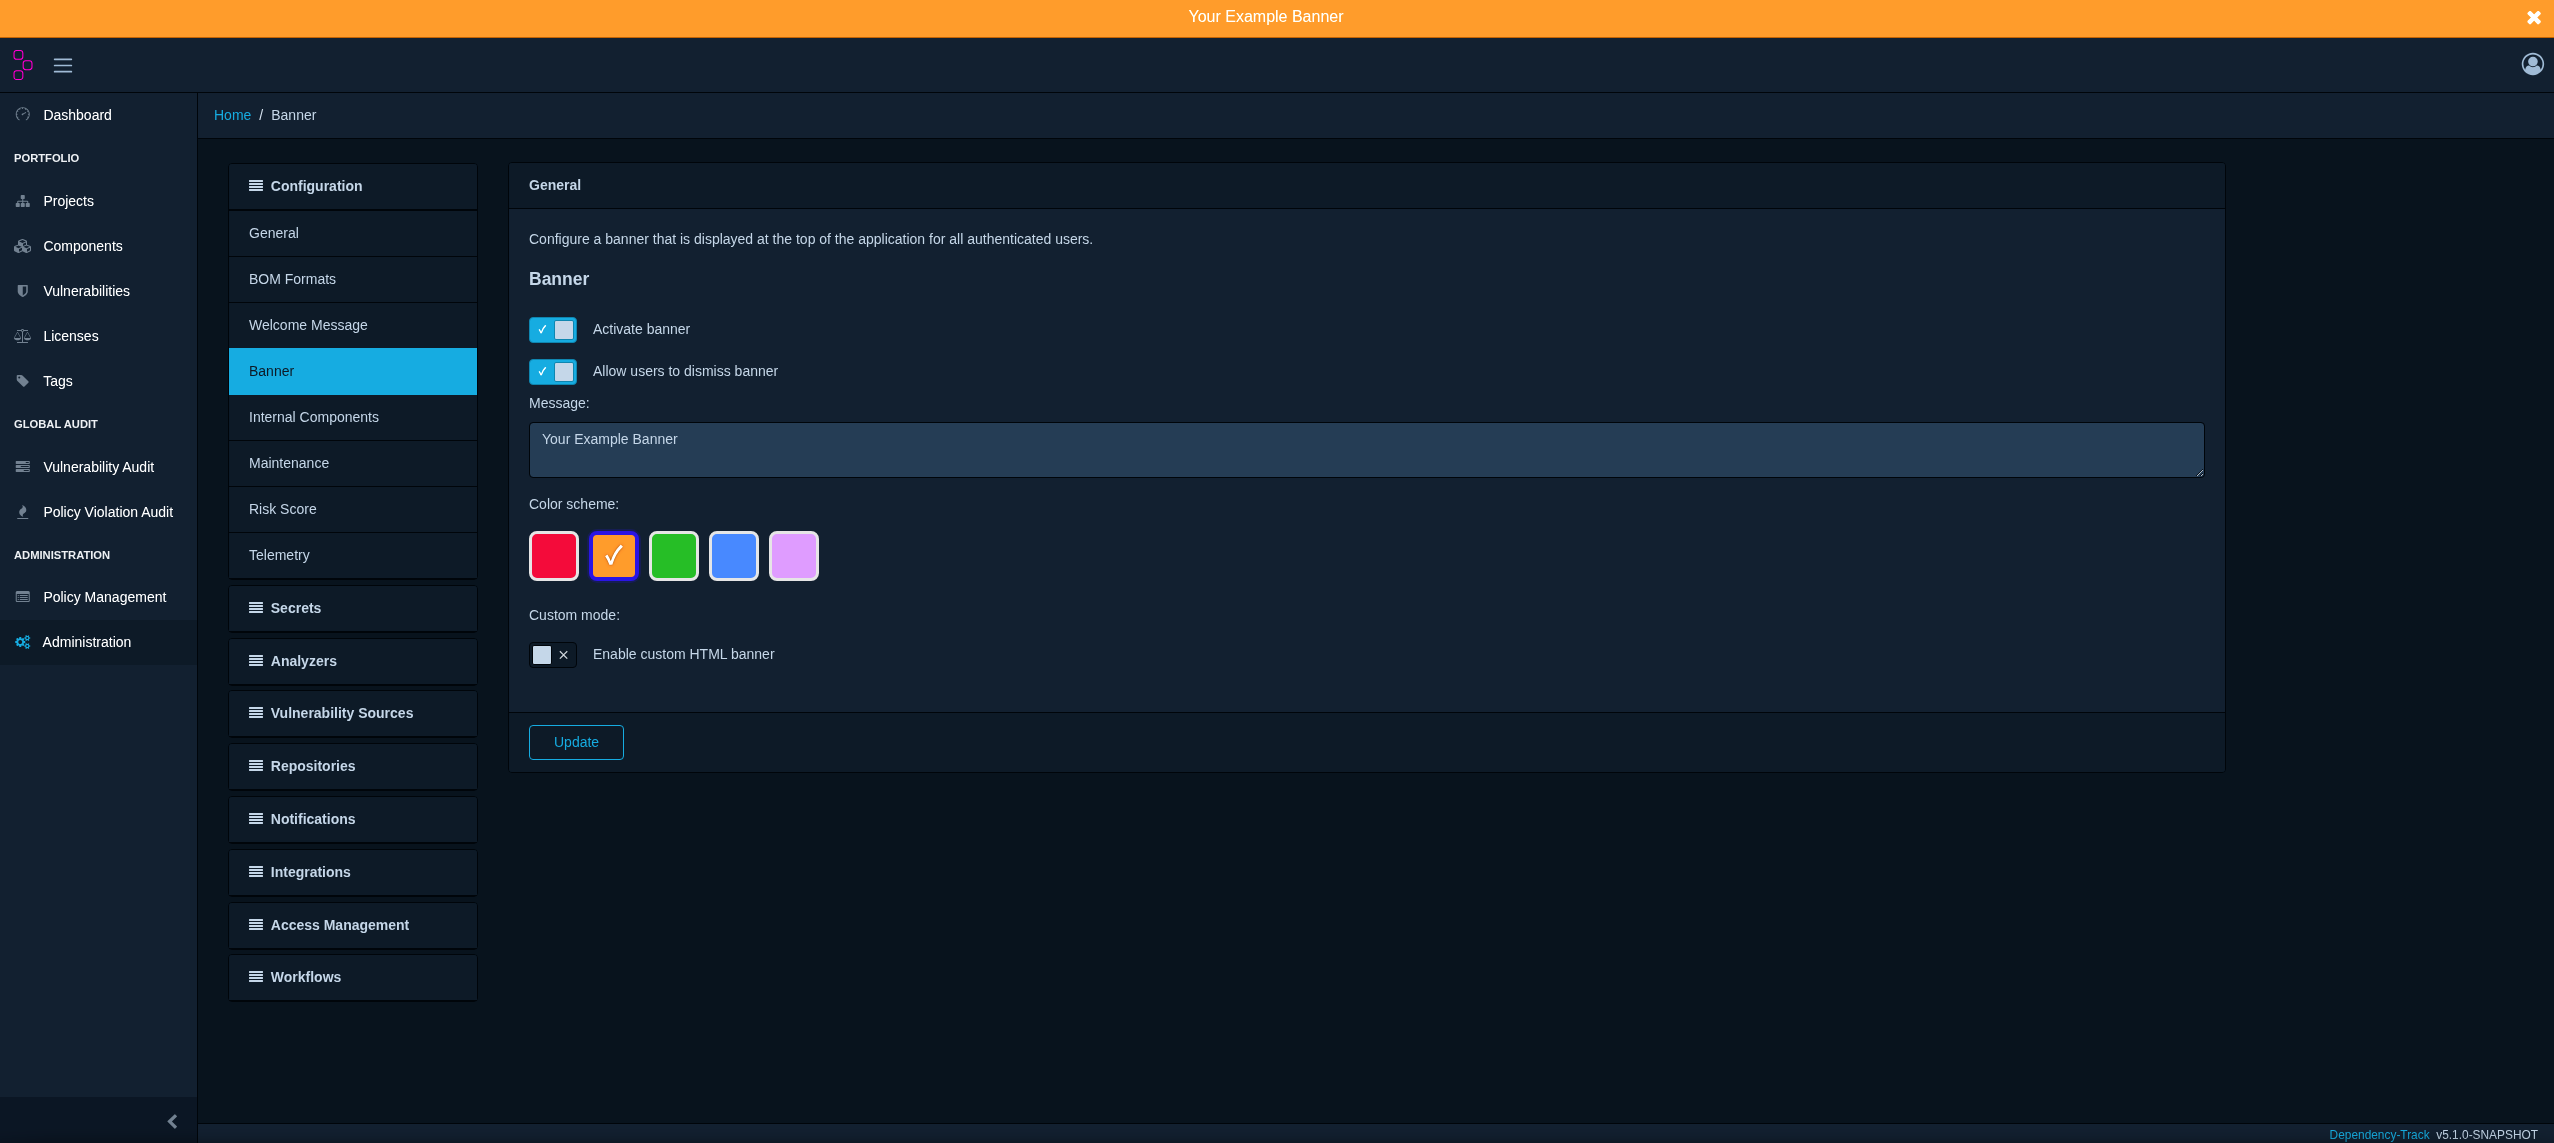
The screenshot below shows a banner configured in default mode with Allow users to dismiss banner enabled:
Custom mode
Custom mode replaces the message and color scheme with a full HTML editor, giving complete control over the banner's styling, layout, and links. Use this mode when the preset color schemes or plain text are not sufficient, for example to embed a link.
To configure a banner in custom mode:
- Enable Activate banner.
- Enable Allow users to dismiss banner if users should be able to close it.
- Enable Custom mode. This clears the message and color settings and seeds the editor with an example template.
- Edit the HTML content in the editor.
- Select Update to save.
Note
When custom mode is enabled, the Message field and color swatches are disabled. The Update button remains disabled while the banner is active and the HTML content is empty.
Example HTML content
1 2 3 | |
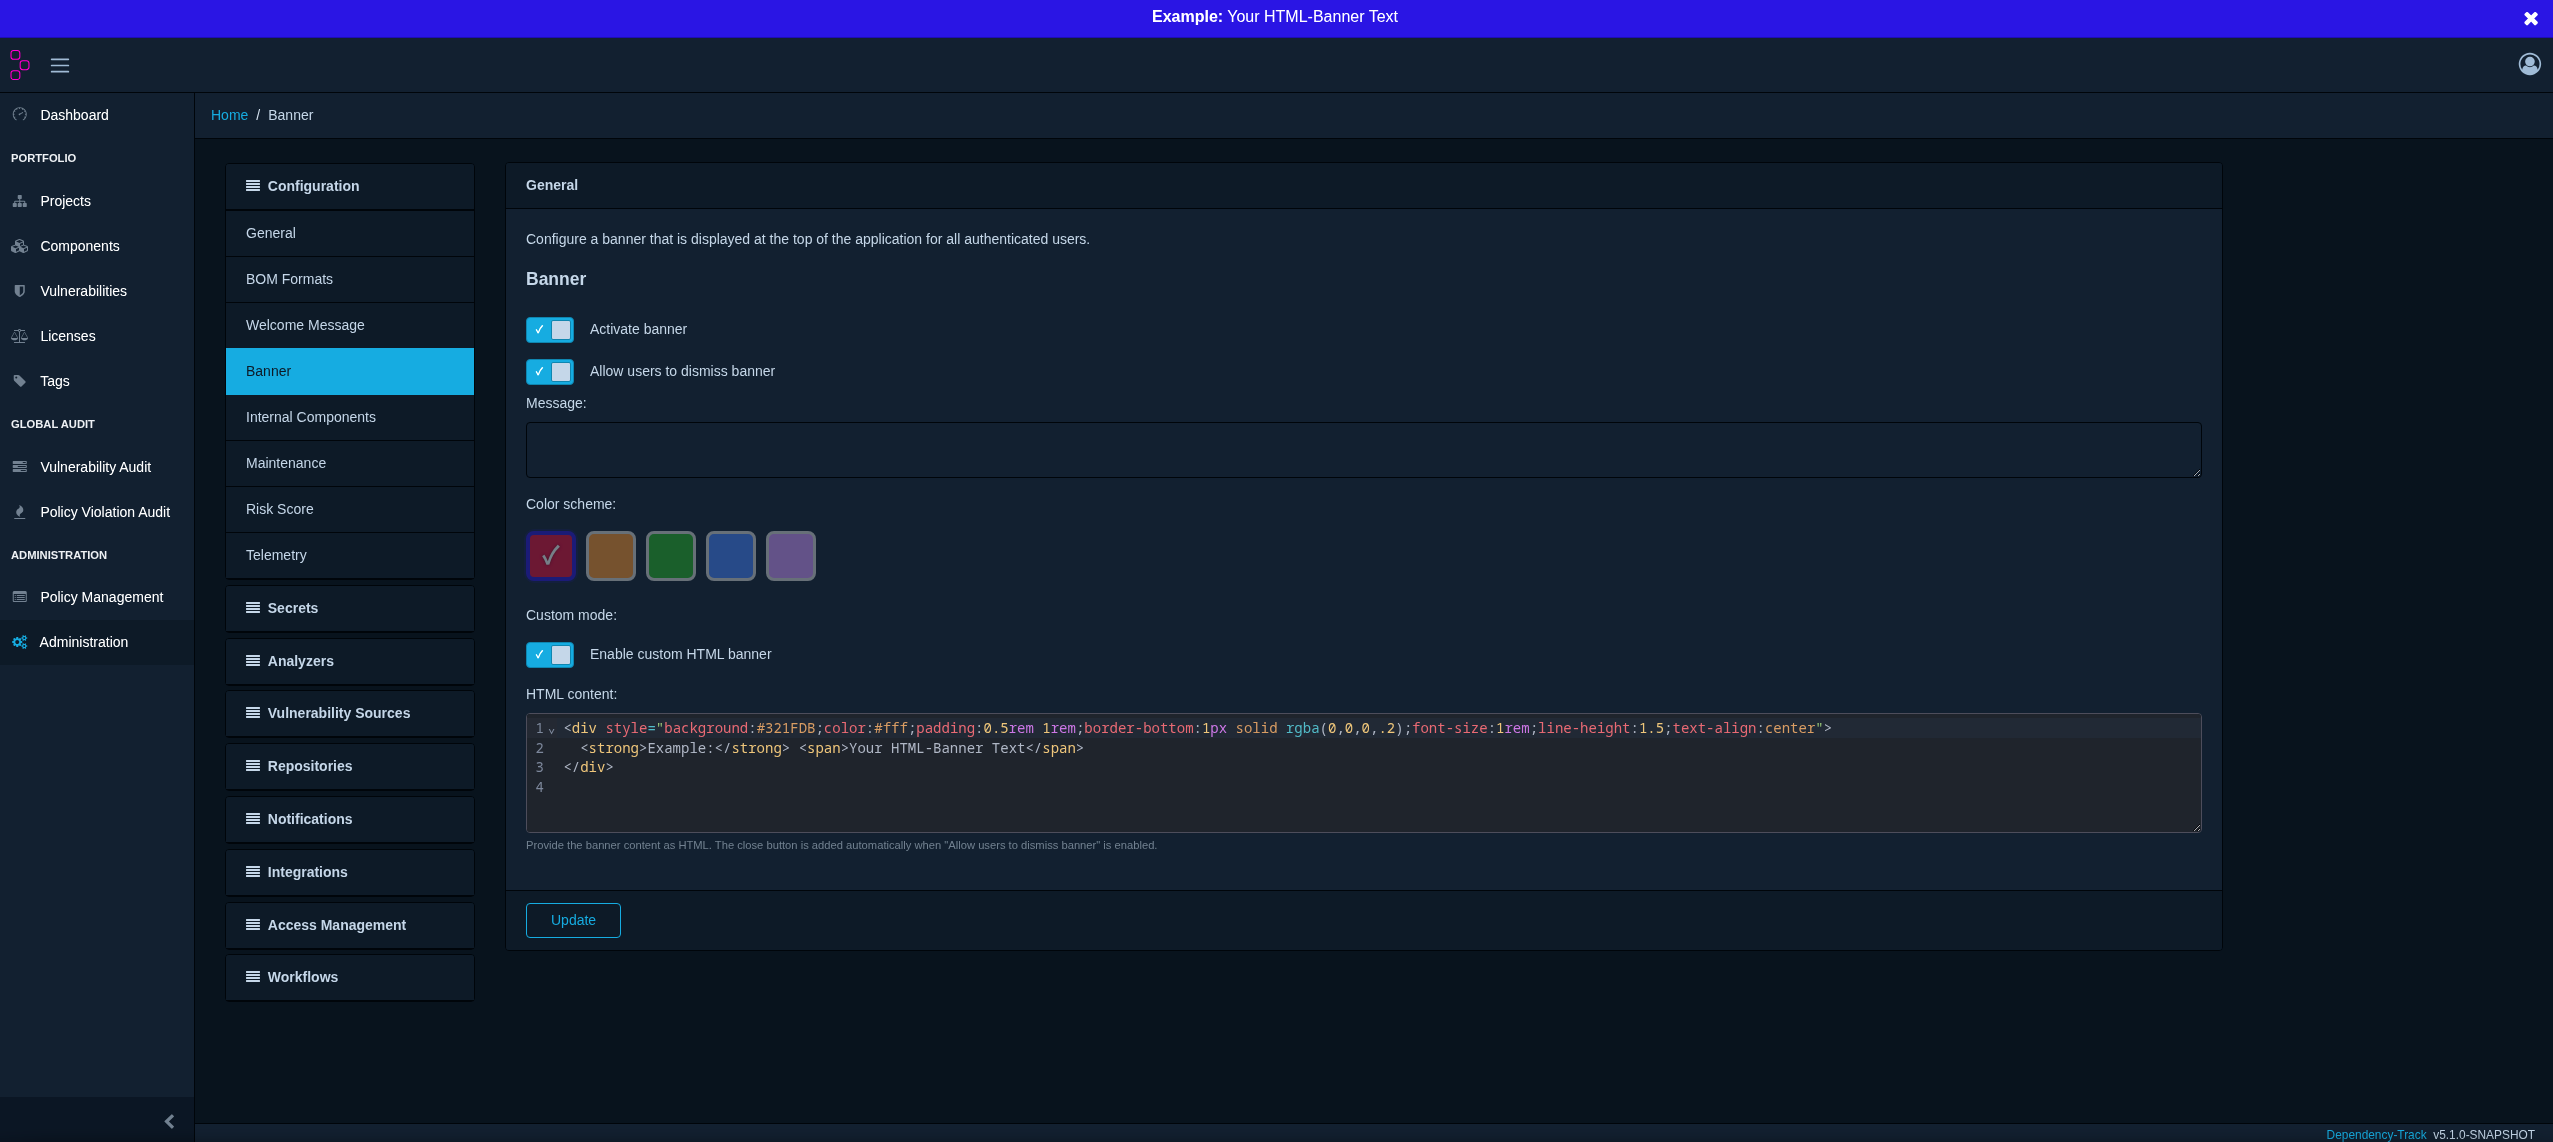
The screenshot below shows a banner configured in custom mode with Allow users to dismiss banner enabled:
Dismissing the banner
The Allow users to dismiss banner option controls whether users can hide the banner themselves.
When enabled:
- A close (×) button is shown in the top-right corner of the banner.
- When a user closes the banner, it stays hidden for the remainder of their browser session.
- The banner reappears in a new login session.
When disabled, no close button is shown and users cannot hide the banner.
