Configuring vulnerability sources
Dependency-Track can mirror three public vulnerability data sources into its internal database: the National Vulnerability Database (NVD), GitHub advisories, and OSV. You pick which ones to enable, configure them through the web UI, and trigger an initial mirror so findings appear without waiting for the next scheduled run.
For background on what each source provides, when one is enough, and how the internal analyzer turns mirrored data into findings, see About vulnerability data sources.
Prerequisites
For each source you plan to enable, allow outbound HTTPS access from the API server to the corresponding host:
| Source | Host |
|---|---|
| NVD | nvd.nist.gov |
| GitHub advisories | api.github.com |
| OSV | storage.googleapis.com |
If outbound traffic must go through a proxy, see Configuring an HTTP proxy. If the proxy intercepts TLS, see Configuring internal CA trust.
The GitHub advisories source rejects unauthenticated requests, so it needs GitHub credentials. Authenticate with either a personal access token (PAT) or a GitHub App. NVD and OSV do not require credentials.
- Personal access token: the simplest option. The token needs no scopes, because it is used only to authenticate. Create one at github.com/settings/tokens. Both fine-grained and classic tokens work. A PAT is tied to the user who created it.
- GitHub App: use this when you want credentials owned by an organization rather than a person. Dependency-Track mints and refreshes short-lived installation tokens automatically. Register an App on the organization, install it, and note the App ID, installation ID, and a generated private key.
Choose one method. The two are mutually exclusive.
Enabling sources
Open Administration > Vulnerability Sources in the web UI. Each source has its own configuration panel. The following steps cover the least configuration needed for findings.
NVD
- Open Administration > Vulnerability Sources > NVD.
- Enable the source.
- Select Test to verify the configured endpoint is reachable and that the feed file format matches what Dependency-Track expects.
- Select Mirror now to download the feed immediately. The first mirror downloads the entire dataset and can take a while.
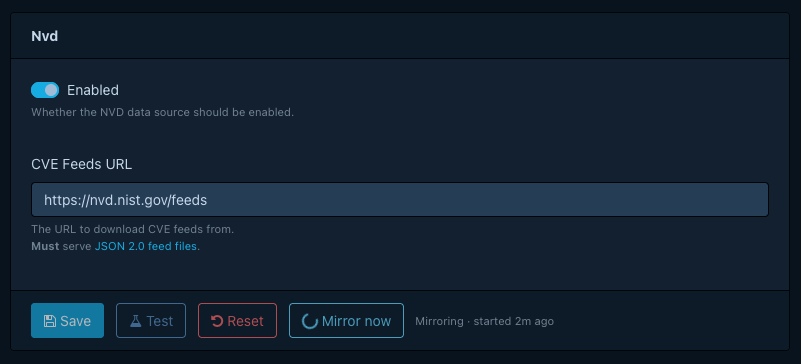
NVD records describe affected products as CPEs. The internal analyzer skips components that lack a valid CPE when evaluating NVD data. If you expect findings for open source packages identified by PURL and see none from NVD, that is the reason. See How component matching works.
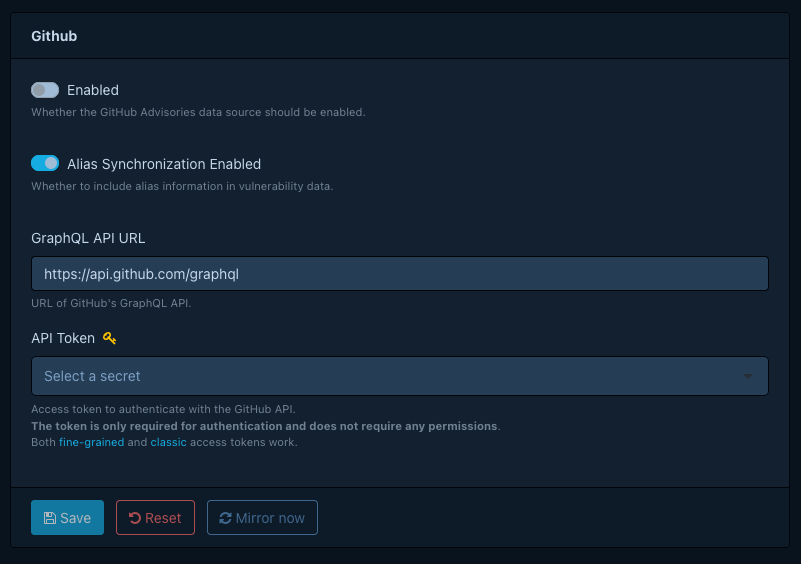
GitHub advisories
- Open Administration > Vulnerability Sources > GitHub.
- Enable the source.
- Enter the credentials from the prerequisites:
- For a personal access token, enter the token in API Token.
- For a GitHub App, enter the App ID, Installation ID, and App Private Key, and leave API Token empty.
- Select Mirror now to download advisories immediately.
Convert the GitHub App private key to PKCS#8
GitHub delivers App private keys in PKCS#1 format (the file starts with -----BEGIN RSA PRIVATE KEY-----), but
Dependency-Track requires PKCS#8 (-----BEGIN PRIVATE KEY-----). Convert the key once, then paste the converted
contents into App Private Key:
openssl pkcs8 -topk8 -nocrypt -in github-app.pem -out github-app.pk8.pem
OSV
- Open Administration > Vulnerability Sources > OSV.
- Enable the source.
- Select the ecosystems you want to mirror. Dependency-Track downloads only the ecosystems you select.
- Select Mirror now to download the selected ecosystems immediately.

Tip
For Debian, select the Debian ecosystem rather than individual Debian version ecosystems. The Debian package is a superset of all version-specific ones.
Triggering an initial mirror
After enabling a source for the first time, use Mirror now rather than waiting for the next scheduled run. The first NVD mirror in particular can take a long time, and you want it underway before users start uploading BOMs and expecting findings.
Mirror progress and errors appear in the API server logs, so tail the logs during initial setup if you need to follow what each mirror is doing.
Scheduling mirror runs
Each source has its own cron property. Mirrors also run on instance startup. To change the schedule, set the corresponding property:
- NVD:
dt.task.nvd-vuln-data-source-mirror.cron - GitHub advisories:
dt.task.github-advisory-vuln-data-source-mirror.cron - OSV:
dt.task.osv-vuln-data-source-mirror.cron
Note
The dt.vuln-analyzer.* namespace (analyzer extension point) is unchanged.
Only mirror task cron properties were renamed.
Verifying findings
Once a mirror completes, upload a BOM for a project that contains components you know to be vulnerable, or trigger analysis on an existing project. Findings should appear within seconds of analysis completing. If they do not, check the API server logs for mirror errors and confirm the components carry the identifier the source uses for matching (CPE for NVD, PURL for GitHub advisories and OSV).